
Creating a COM+ Application for an ASP Component in Component Services
If a 32 bit ASP component is to be run on a 64 bit operating system it must be added to a COM+ Application in Component Services. Appropriate permissions must be set on the DLL and in the later Windows operating systems some additional settings must be made to the application. The description here is based on Windows 2008 Server (x64) and that is where the screen shots were taken, but it applies to later versions as well. The process is still very similar to that used on Windows 2000, which was based on MTS in NT 4.
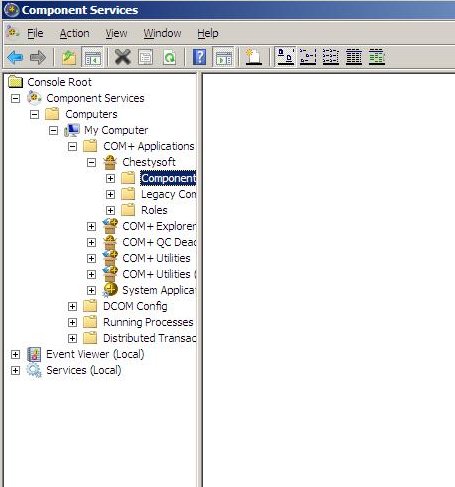
Component Services is found under Administrative Tools.
Before we start - Do not put 32 bit DLLs in the System32 folder on a 64 bit Windows system. The name is misleading because the system reserves that folder for 64 bit files only. They can go almost anywhere else but we would suggest that you create a folder specifically for component DLLs so that you know where they are and they will not get mixed up with other files.
If the DLL is not registered, it can be registered during the process described below.
We have written this description to show how a component can be used in a 64 bit environment but this is also required if a component needs to access network files, on either a 32 bit or 64 bit system. Component Services allows the component to run under a nominated user account instead of the anonymous internet user.
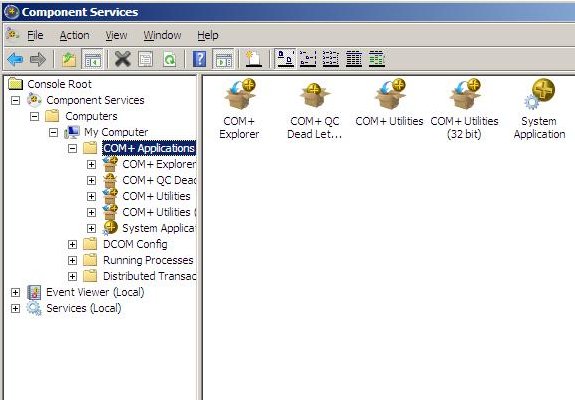
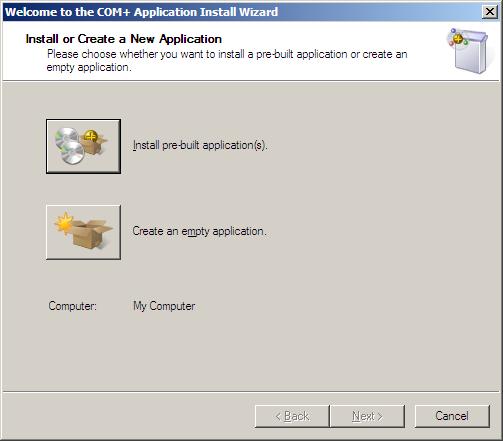
To create a new empty application, expand the tree view to the left and right click on the folder marked "COM+ Applications". Select New and Application from the pop up menu. This starts the COM Application Install Wizard. There is a choice to install a pre-built application or create an empty application. Select "Create an empty application."
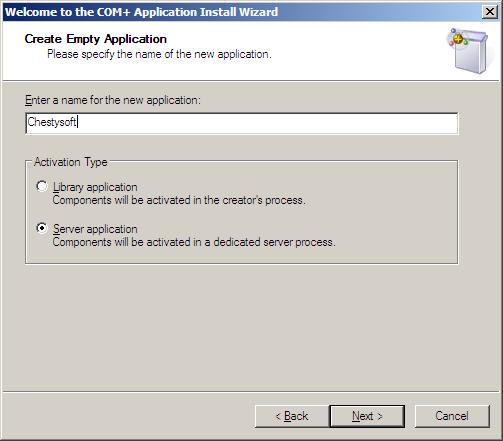
You will be asked for a name for the application. You can use any name but if you are adding multiple components to the application it is probably better to use a general name rather than the name of one of the components. We have called it "Chestysoft". For Application type select the default, "Server application"
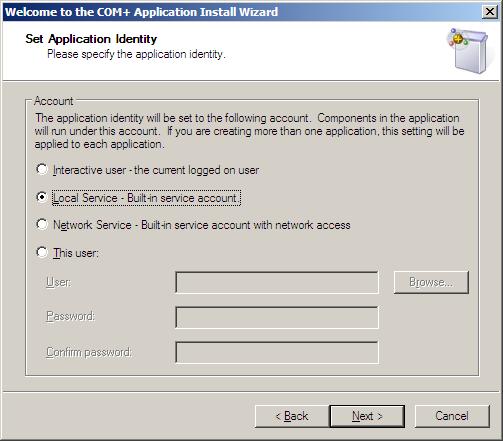
Next select the Application Identity. There are some choices here and the identity depends on the use. Avoid using the interactive user if the server will run with no user logged in, because then there is no interactive user and the application will not run. We have selected the Local Service user, but this would not be suitable if the application needs to access network files. A separate account could be created if special permissions are needed.
Whatever account is selected here, it will be used to run any components in the application and it must be given permission to read and execute the component DLL and also appropriate permission on any files or folders.
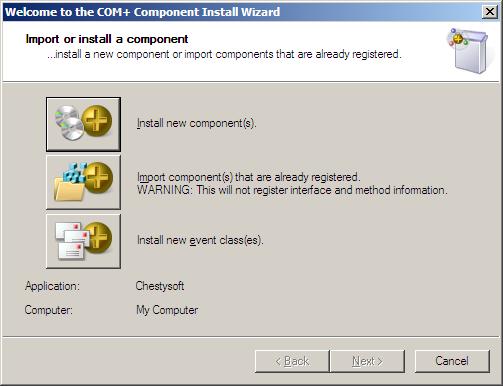
Use the Next button to accept the defaults for Application Roles and that completes the COM Application Install Wizard. Now add a component to the application. Expand the tree view on the left and open the Components folder. Right click on this folder and select New and Component from the pop up menu. This starts the COM Component Install Wizard.
There is a choice to import a new component that is not registered, and the system will register this as it is imported, or an existing component can be selected from a list of available components. We will show the route of importing a new component. If you import an existing component, note that there is a check box that allows you to select from available 32 bit components.
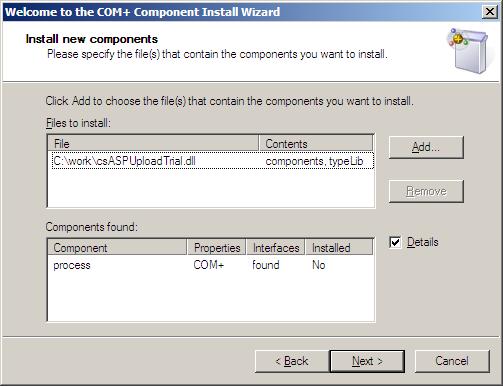
Navigate to the DLL of the component and select it. Once selected, the following screen is displayed which shows the component file and class name. It is possible to select further components at this stage. Select Next to complete the wizard.
Configuring the Application
The application has now been created and the component(s) added, but it may not work without further configuration. The exact configuration needed will depend on the operating system. On Windows 2000 it should work straight away accepting the defaults. On both Windows 2003 and Windows 2008 the Application Properties must be edited.
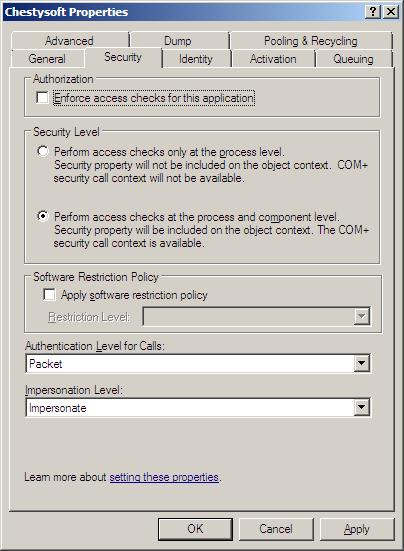
Again in the left hand tree view, expand the tree so that the Application name is visible (it was Chestysoft in our example) and right click on it. Select Properties from the pop-up menu. Select the Security tab and clear the check box marked "Enforce Access Checks". On Windows 2000 this will be clear by default but not in the later versions. If it is ticked it will result in an ASP 0178 error when trying to create an instance of the component.
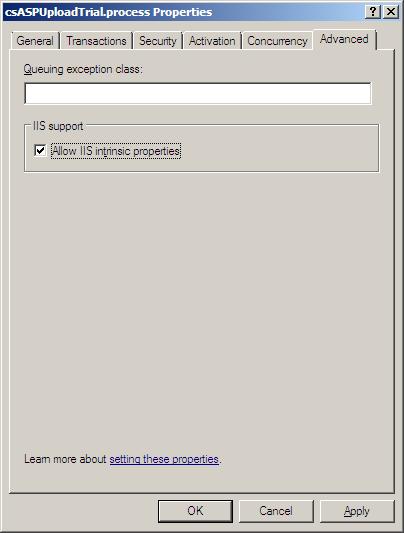
In Windows 2008 Server there is a further setting to be made in the Component Properties, if your are running a component that needs to access the ASP Request or Response objects. With our components this includes csASPUpload, csASPZipFile and csFileDownload.
To edit the Component Properties expand the tree view until the component is visible in the right hand pane, then right click on the icon and select Properties. The Advanced tab contains the following screen where you must check the box marked "Allow IIS intrinsic properties". This property was not present in Windows 2003 or earlier and if it is not set, any component that uses Request or Response will either generate an error or fail to load.
always restart IIS for the changes in Component services to take effect. You can also restart the COM+ Application by right clicking on the application name in the left hand tree view and selecting Shut Down followed by Start.
DLL Permissions
The user account that uses the component must have Read and Execute permission on the DLL file. If you have set the Application Identity to be "Local Service", give the SYSTEM account permission to read and execute the DLL. If the component will write to a folder, that folder must also have the permissions set to allow this acount to Read and Write. If files are to be deleted or overwritten, the permission required is "Modify". Write permission is only enough to create new files, not to delete or overwrite.